|
|||||||||
|
|
Imaging Software Reviews Adobe Photoshop Lightroom 2.0
Adobe creates a comprehensive digital image workflow suite
I tried, honestly. Years ago I used one of the first image cataloging systems and spent a great deal of time tagging the images with keywords. Then the database got corrupted and that was the end of that project. Later, some of the software that came with digital cameras or printers tried to scan my computer and import whatever pictures it found into some proprietary application. I always resented those unsolicited shovelware attempts at taking over my image libraries. Finally, I began using iPhoto on my Mac. iPhoto is a nice application, but it's limited in what it was designed to do.
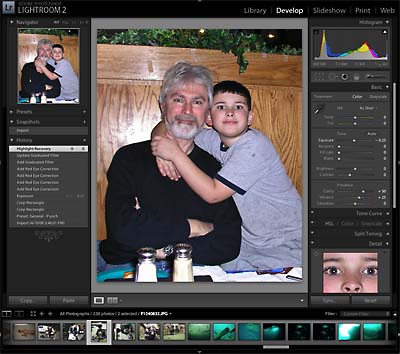
So what is Lightroom? It's a neatly integrated application that contains five modules: Library, Develop, Slideshow, Web, and Print. Library and Develop are the major parts; slideshow, web, and print are icing on the cake. The Library module is used to organize, manage and sort pictures in various ways. Develop lets you perform image enhancements so that you don't have to fire up Photoshop for everything. What you can do in the Develop module is not meant to replace Photoshop, but there are a numbe rof powerful and very intuitive editing tools.
Unlike most commercial software, Lightroom had an extended public beta period during which users were encouraged to examine every aspect of the application and suggest changes and improvements. According to Adobe, there were a million and a half downloads and 600,000 unique testers of the initial version. Numerous suggestions were incorporated into the product. Lightroom, in essence, while conceived by the masterminds at Adobe, grew and matured in Web 2.0 fashion as a community effort of dedicated photographers worldwide.
Central to Lightroom is the concept of non-destructive editing where you can easily move back step by step through all the changes until you are back at the original.
Initially, getting into Lightroom can be a bit of a challenge. I had read Adobe Photoshop Lightroom 1.1 for the Professional Photographer by David Huss and David Plotkin and that helped. After spending some time with an early version of Lightroom (1.3) I started to get the core ideas behind Lightroom and its non-destructive editing. Lightrom is using the DNG digital negatives developed by Adobe as an archival file format for the RAW files generated by digital cameras. With file formats other than DNG digital negatives, non-destructive editing works by keeping all edit data in a small "sidecar" file; the original image remains unchanged. If you save multiple versions of the same image, there will be multiple "sidecar" files but still only one original image. That saves disk space.
Support for dual monitors can make a huge difference for professional photographers, especially when you use one in full-screen and the other in "loupe" mode. The better Photoshop integration means it's less of a hassle to switch back and forth between Photoshop and Lightroom. The new and enhanced editing tools (still, of course, without affecting the original image) are terrific.
The improved searching capabilities streamline and speed up the entire search/locate process and let you get to things more quickly. In 2.0, you can also search across multiple drives. That comes in handy for those of us who like to spread things out. Overall, searching in Lightroom 2.0 is more plasant because all search functionality are now concentrated in one area as opposed to being in various locations in earlier versions.
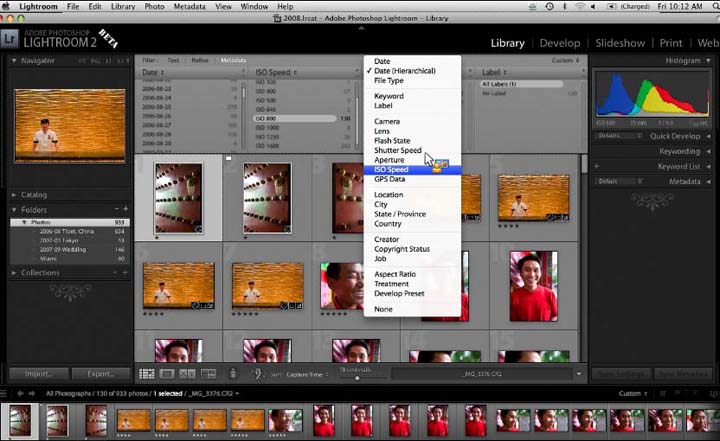
Another 2.0 improvement that makes searching easier is "smart collections." As has been available in Adobe Bridge for some time, smart collections let you pick all images that fill certain criteria, like pictures that were taken by a certain camera, or with a certain f-stop, etc. The image below shows the clean interface and how you can quickly find all images shot at a certain ISO speed.
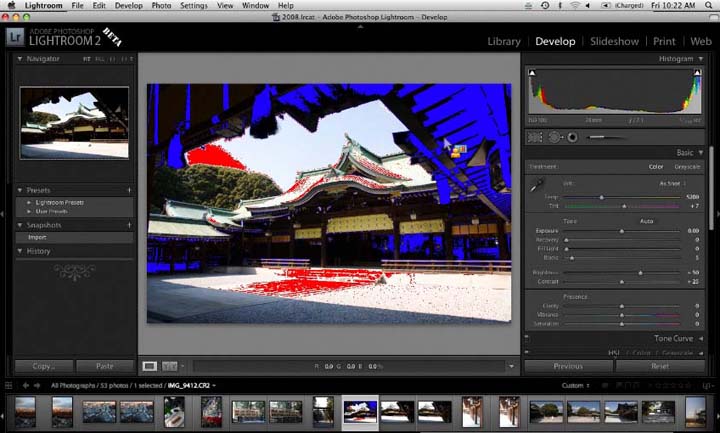
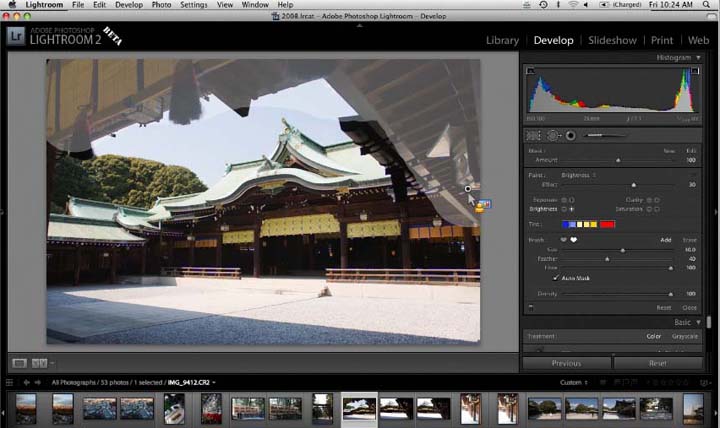
Lightroom's "develop" module is actually a very powerful image editing tool. The emphasis is on making editing quick, simple and intuitive. Some filters are "graduated," and can be applied in subtle ways. This way you can highlight detail without blowing out other parts of the picture. A localized correction mode shows an adjustable mask, or you can use an auto-mask that does the selection for you. The picture below, for example, is a great shot, but the sky is blown out whereas the underside of the temple's roof is too dark.
Lightroom lets you very easily "paint" a smart mask. The below picture shows one such mask, represented by the grayish area covering the roof overhang. Masks can easily be fine-tuned so they affect only the exact area that needs to be edited. A second, separate mask was later applied to the sky which looks blown out but had, in fact, been blue with clouds
After simple but very effective editing you can see a "before" and "after" in the image below.
Shooting RAW can be a pain because the files are so large and because, in the past, using RAW file conversion filters was at times frustrating and did not always result in the best pictures.
On the other hand, shooting raw also means you get absolutely all the data the camera has captured. If you simply save your precious pictures as JPEGs you may lose important image data that you can never get back. If part of a JPEG picture are totally blown out or way too dark, no amount of image manipulation can bring the data back.
However, if you saved in RAW format, chances are that there is enough data to rescue a seemingly hopeless image. Look at all the detail data Lightroom managed to retrieve from a RAW picture that would have been a total loss had it been saved as a JPEG.
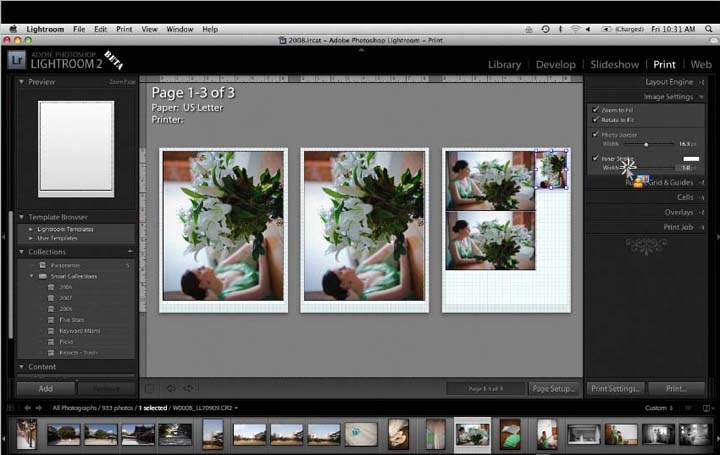
Print quality and versatility are improved in version 2.0 as well. You can do quick picture packages with multiple picture sizes, or you can use templates. The overall ideas was to provide more flexibility when printing and making the most efficient use of paper. You can also print to JPEG and there is a print sharpening system created in conjunction with the folks at PixelGenius. The whole sharpening process was optimized and can now run in automatic mode.
Below you can see how prints can be arranged in whatever size you need them, without wasting any expensive photo paper.
Some panels have been simplified in Lightroom 2.0. This does not mean that there's less functionality, just that things are streamlined so that functions are easier to find and use. In the original 1.x versions, people could often not find the features they wanted even though they were there.
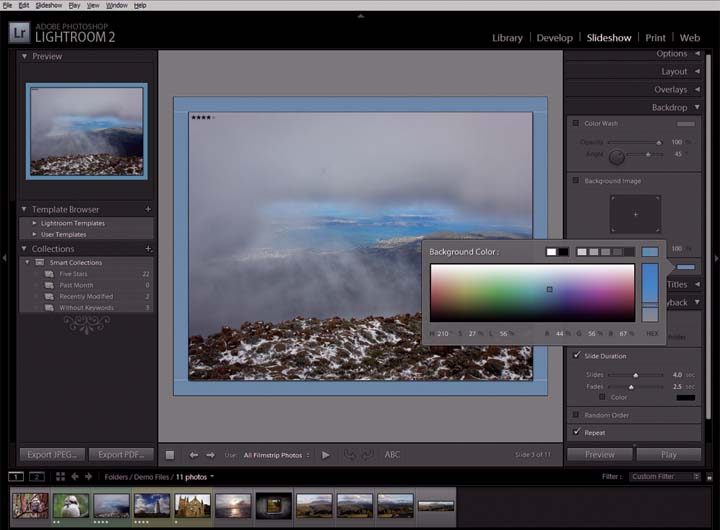
Below you can see the "Slideshow" module. Note how clean and simple the controls are, yet everything you need is right there.
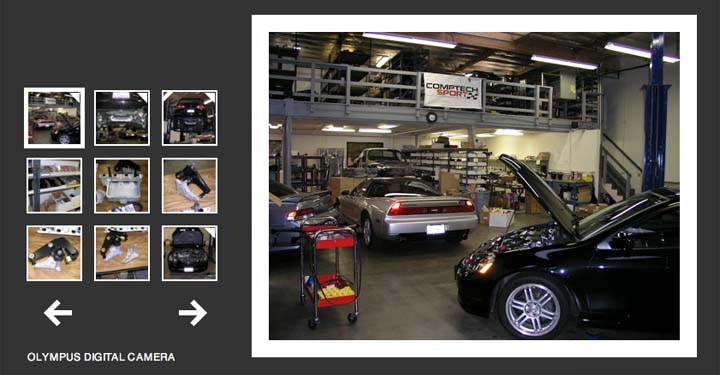
Often, it's easiest to show a client (or anyone else) pictures through the web. That's where Lightroom's Web module comes in. You simply pick one of the gallery templates and styles, then set colors, captions and other details, determine sharpening, and then output the code. Lightroom can even upload it to a website for you. Below is an example of a simple, but very effective, web layout.
The availability of Lightroom changed over time. The early betas were downloadable to all. In February of 2007, commercial version 1.0 became available, followed by updated 1.x versions. In April of 2008, the 2.0 beta became available and 1.x customers could download and use the 2.0 beta for the full beta period. Those new to Lightroom could download and install the beta and use it for 30 days. By the end of the roughly four month beta period, there had been about 130,000 downloads. On July 29, 2008, Adobe announced the final, shipping version of Lightroom 2.0. Price is US$299, and 1.x version users can upgrade for US$99.
Being new to Lightroom I felt I needed more information. I didn't feel comfortable importing pictures from a non-specified mass storage device when I had multiple cards and card readers plugged in. I also wanted to know if images imported from another location on my hard disk would be physically copied somewhere as that could use up some serious disk space (it can do it either way). In case the pictures were simply moved I wanted to know where to, or whether Lightroom would leave them in their original place and keep track of things in some other way. Those are important considerations, and I had hoped to see some sort of friendly introductory explanation as to how Lightroom goes about things. As is, there was none of that and all I saw was Lightroom's clean but somewhat intimidating looking interface and the dialog window that prompted me to start importing.
That may not seem like a big issue, but it is. Importing into a major application like Lightroom requires some serious decisions, and in order to make those decisions I needed to know how Lightroom worked. For example, the import window wanted to know if photos should be copied to a new location or copied and imported as digital negatives. I must admit that I did not know much about digital negatives (the digital negative, or DNG, format is an Adobe file format that's based on TIFF and includes integrated metadata and an editable preview). Importing also requires making decisions about backups, naming conventions, develop settings, metadata settings, keywords, the types previews and lots more.
Why am I mentioning all this? Because it means that no matter how simple and clean even version 2.0 of Lightroom may be, you have to do some reading, learning and planning before you start working with it or import anything.
For clarification, here are the various ways you get pictures into Lightroom:
I have no doubt that Adobe Lightroom will continue to develop and mature. And thanks to Adobe's willingness to incorporate community suggestions, it will likely develop into a tool uniquely suited to the needs of serious photographers. As is, if you invest in learning Lightroom and setting everything up properly, it will reward you with a streamlined, efficient way of handling the kind of large photo libraries many of us are dealing with today.
|
||||||||
|
|
|||||||||
|
©
All Rights Reserved. |
|||||||||

 In the olden days, the number of pictures we took was somewhat limited by the cost of film and making prints. Digital cameras eliminated that limitation as we can store hundreds of pictures on a small memory card and tens of thousands on a hard disk. The sheer number of pictures many of us have on our computers can make the film-era keeping track of prints and negatives look like child's play. I am a relatively organized person, but with several computers, several digital cameras, and dozens of storage cards in different formats it's almost impossible to know where all my pictures are, let alone organize them in a meaningful way. It is possible, of course, but it really takes an effort.
 Adobe's overall goal for Lightroom was to create a comprehensive tool for professional photographers and other advanced users to import, review, edit, catalog and publish large numbers of pictures. Lightroom is not a replacement for Photoshop though it has powerful editing features. Instead, Adobe views Lightroom as a part of a digital photographer's "toolbox." Lightroom was designed for the overall management of the digital photograph workflow, from the moment an image leaves the camera to the moment it is shared with a client or published in some other way.
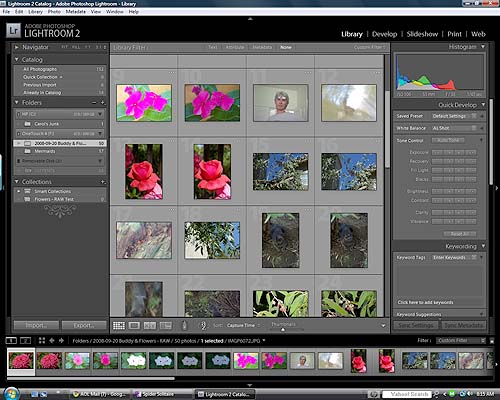 How does Lightroom relate to Adobe Bridge? There is definitely some overlap, but the two applications have a different primary focus. Lightroom's is on overall image workflow management for those who work with large numbers of images, whereas Bridge integrates more closely with the full Adobe Creative Suite and serves as a preview of PDF, Illustrator and InDesign documents. As far as the Photo Organizer in Photoshop Elements goes, it remains a very attractive alternative for those who do not need the full workflow management capabilities of Lightroom.
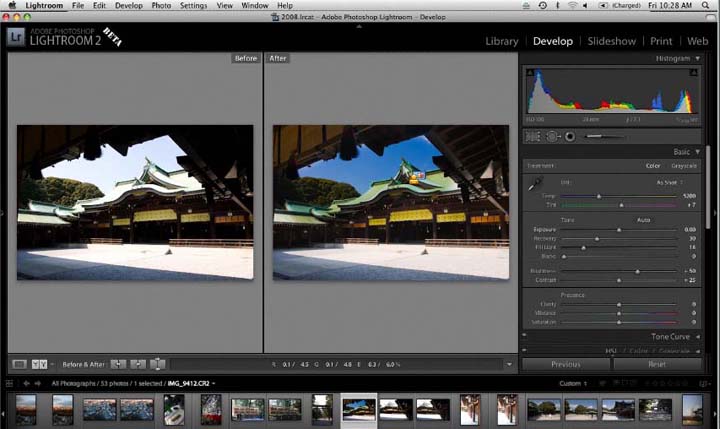
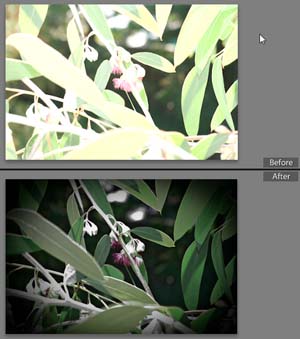 The before and after pictures to the right are not only a great illustration of Lightroom's editing powers, but also why using RAW files and digital negatives is such a good idea.
 As in most applications, the Preferences settings are key to how Lightroom behaves. You can tell Lightroom whether it should or should not automatically offer to import whenever it detects a memory card. You can also set dozens of other things, and some are far from obvious. At times it seems like you need to be part of a secret professional photographers' guild to know what all those options mean. And you're never quite sure if a single wrong setting can mess you up royally. For example, if I "make defaults specific to camera serial number" can I still use another camera? And so on. It's a learning experience, but one with great rewards if you stick with it and figure it all out.